


DIY Ultrasound Tool Project
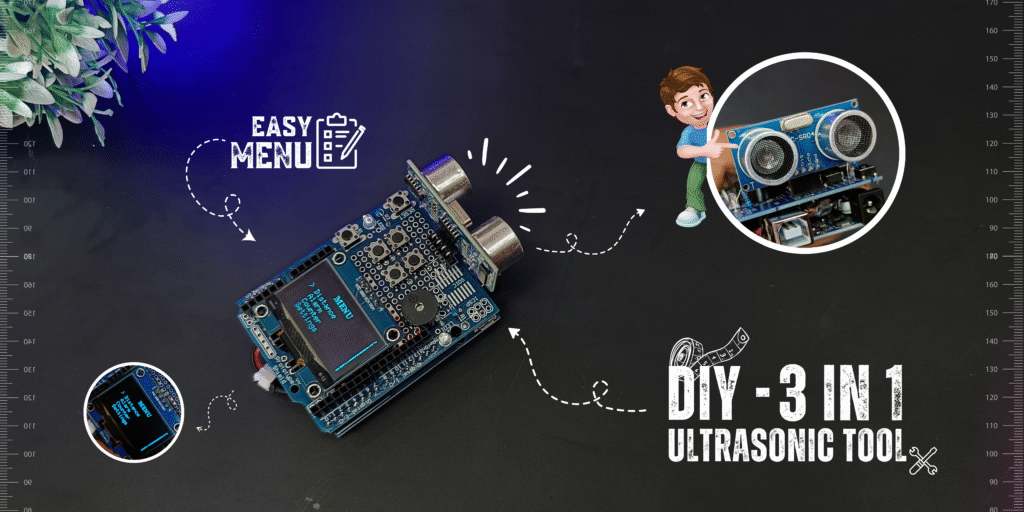
 Ultrasound Tool Project – DIY Distance Measuring & Object Detection System
In the age of automation, precise distance measurement and object detection have become critical in various applications, from industrial automation to robotics. This project showcases a DIY Ultrasound Tool, designed and built using Arduino, that provides real-time distance measurement, object detection alarms, object counting, and customizable settings — all in one compact device.
 Features & Functionalities
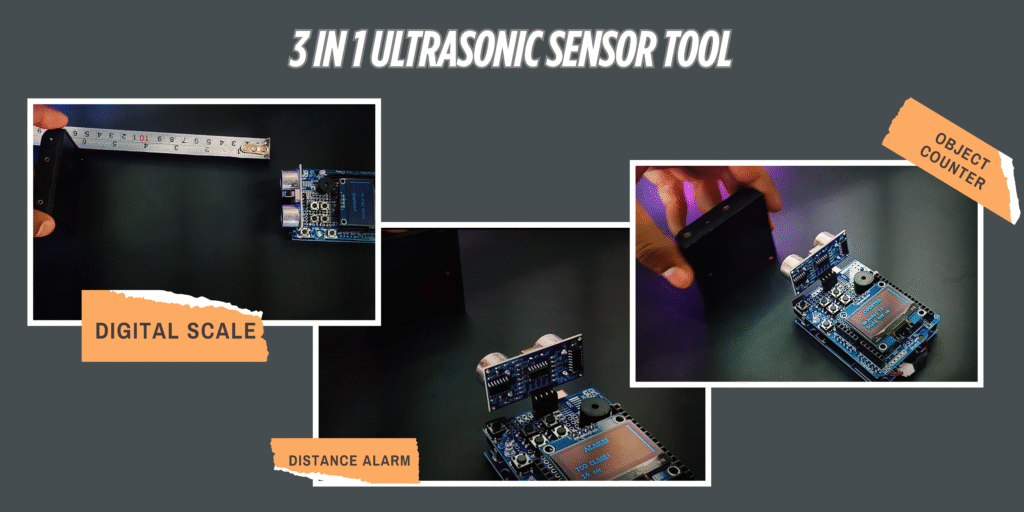
Digital Distance Scale: Continuously measures and displays distance in real-time on the OLED screen.
Alarm System: Sounds a buzzer when an object enters a user-defined detection range.
Object Counter: Tracks and displays the number of objects passing in front of the ultrasonic sensor.
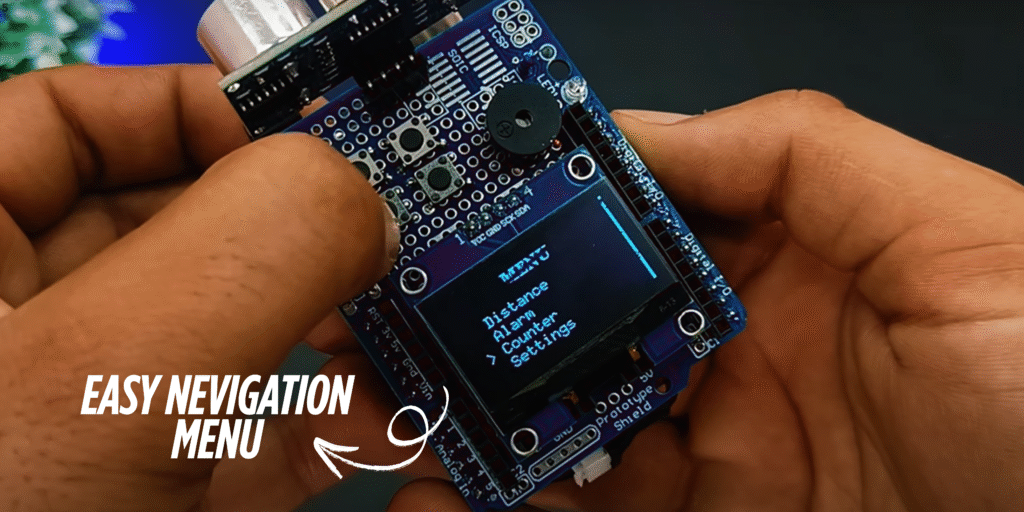
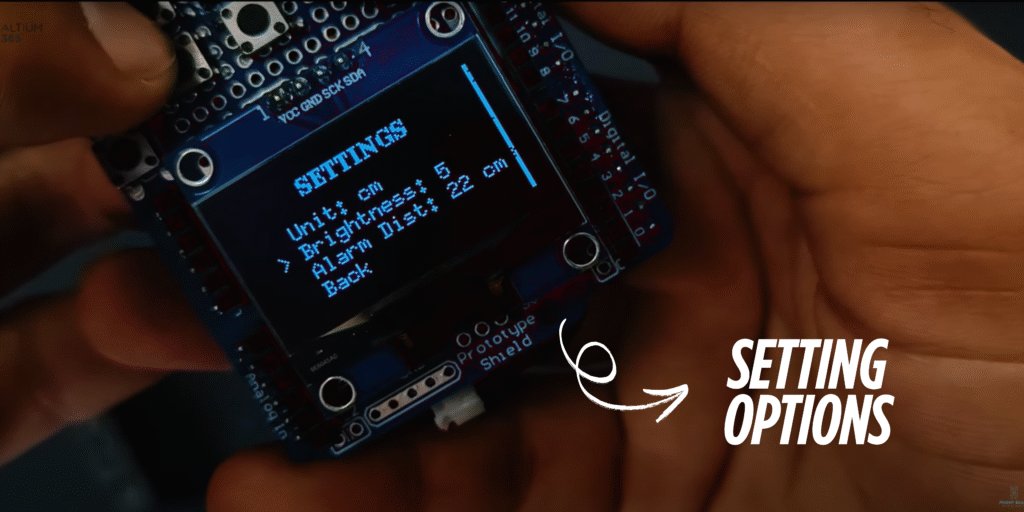
Settings Menu:
Unit Conversion: Toggle between centimeters and inches.
Brightness Adjustment: Customize OLED display brightness for visibility.
Alarm Distance Setting: Set and modify the alarm trigger distance threshold.
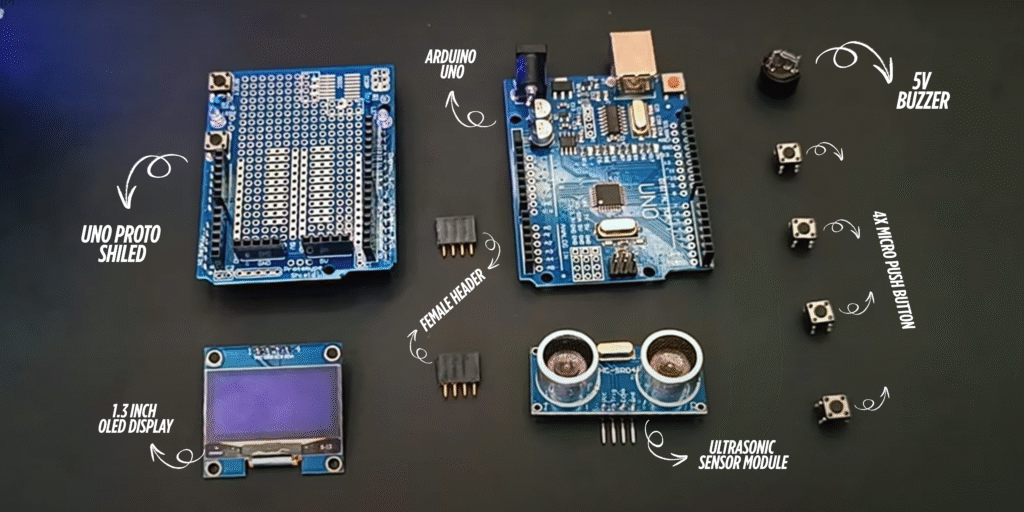
 Components Used
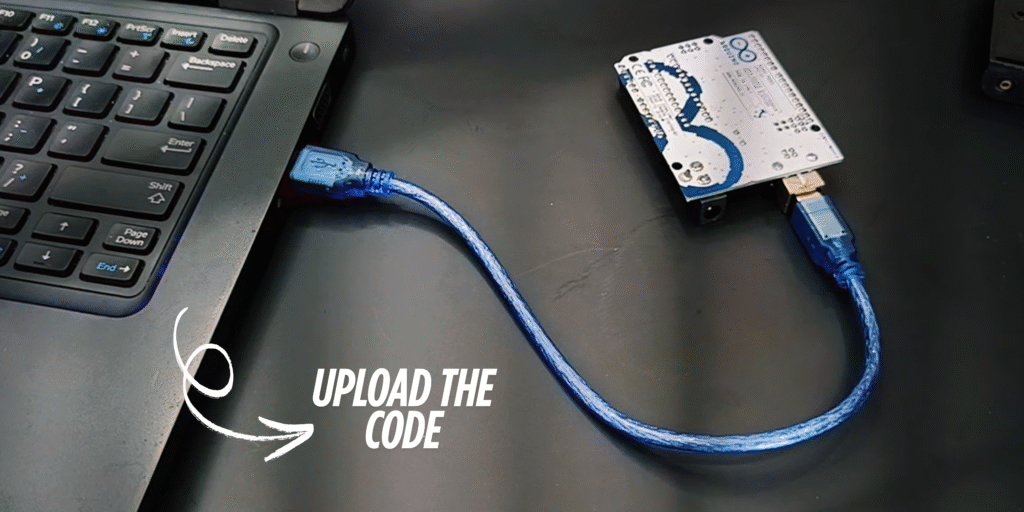
Arduino Uno: The central microcontroller for processing sensor data and handling input/output operations.
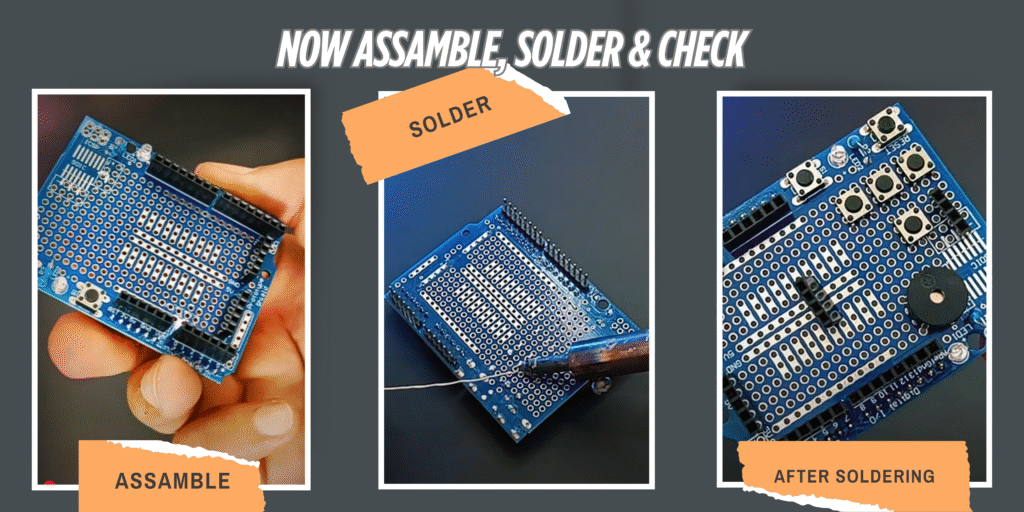
Arduino Proto Shield: A convenient platform for finalizing and soldering the tested breadboard circuit.
1.3-inch OLED Display: Provides a clear visual interface for displaying measurements, menus, and system feedback.
Ultrasonic Sensor (HC-SR04): Measures the distance of objects by emitting ultrasonic waves and calculating reflection time.
Pushbuttons (x4): User interface controls for menu navigation (Up, Down, Select, Back).
Buzzer: Alerts the user when an object reaches a predefined distance.
Breadboard & Jumper Wires: Used for initial prototyping and testing of circuits.
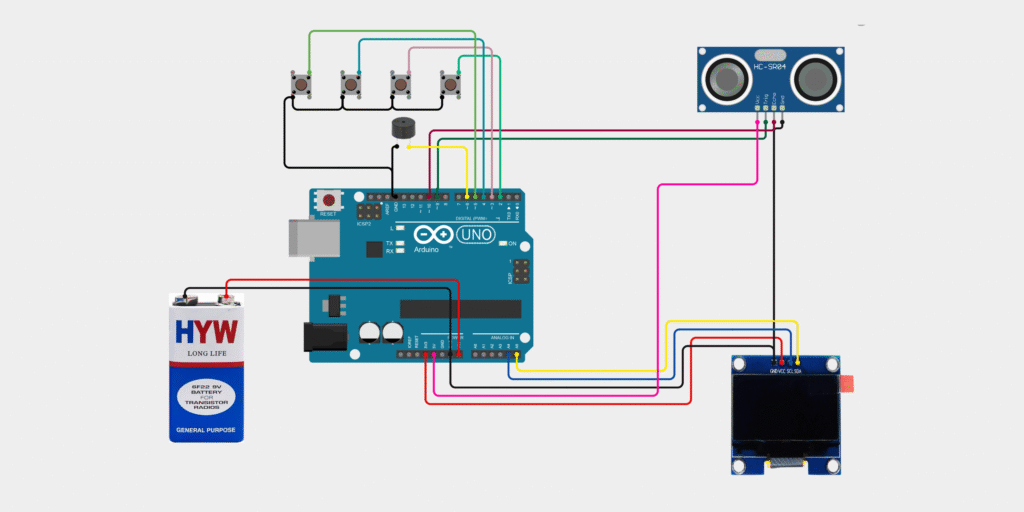
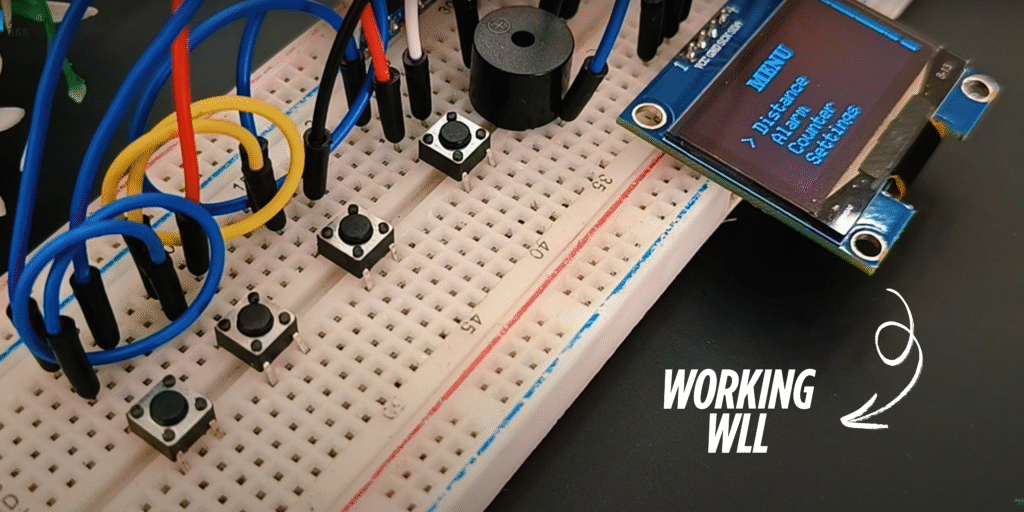
 Development & Deployment Process
Step 1: Prototyping on Breadboard
Initial circuit design and testing were carried out on a breadboard.
Each component (ultrasonic sensor, OLED display, buzzer, and buttons) was connected to the Arduino Uno.
Code was uploaded via Arduino IDE to ensure correct sensor readings, display outputs, and button responses.
Multiple iterations were done to verify accuracy and correct any wiring or logical errors.

 Technologies Used (In Detail)
Arduino IDE (C/C++ Programming):
Used for writing the core logic to handle sensor inputs, process data, manage the menu system, and control output devices (display & buzzer). Download Arduino IDE- Ultrasonic Sensor HC-SR04 Library:
Simplified interaction with the ultrasonic sensor, making it easier to get distance measurements accurately and quickly. Download Library OLED Display Library (U8g2 / U8glib):
Provided efficient rendering of text and graphics on the small OLED display, including custom menus and indicators. Download LibraryDebouncing Techniques:
Implemented in code to ensure reliable pushbutton input handling, avoiding false triggers during menu navigation.Prototyping Tools:
Utilized breadboards and jumper wires during the initial development phase for flexible and rapid testing.